[PF/PlayAsset] 개발환경구성(3) - Property, R2dbc
2022.09.26
개발환경구성
- FE: React-Native
- BE: WebFlux
- DB: MySQL, Redis
- IDE: Android Studio, SpringBoot(2.7.3)
- JDK: 11
- SERVER: AWS
주제
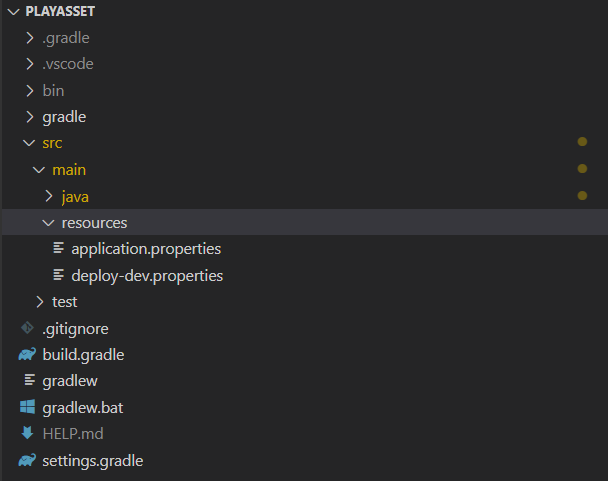
① property 파일은 반드시 project/resources 하위 경로에 만들어져야 한다.
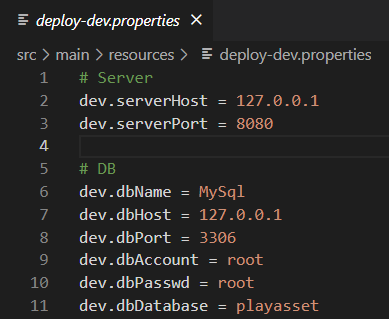
② DB 접속정보, 서버 접속정보 등을 property로 관리할 수 있다. (암호화된 Value도 가능)
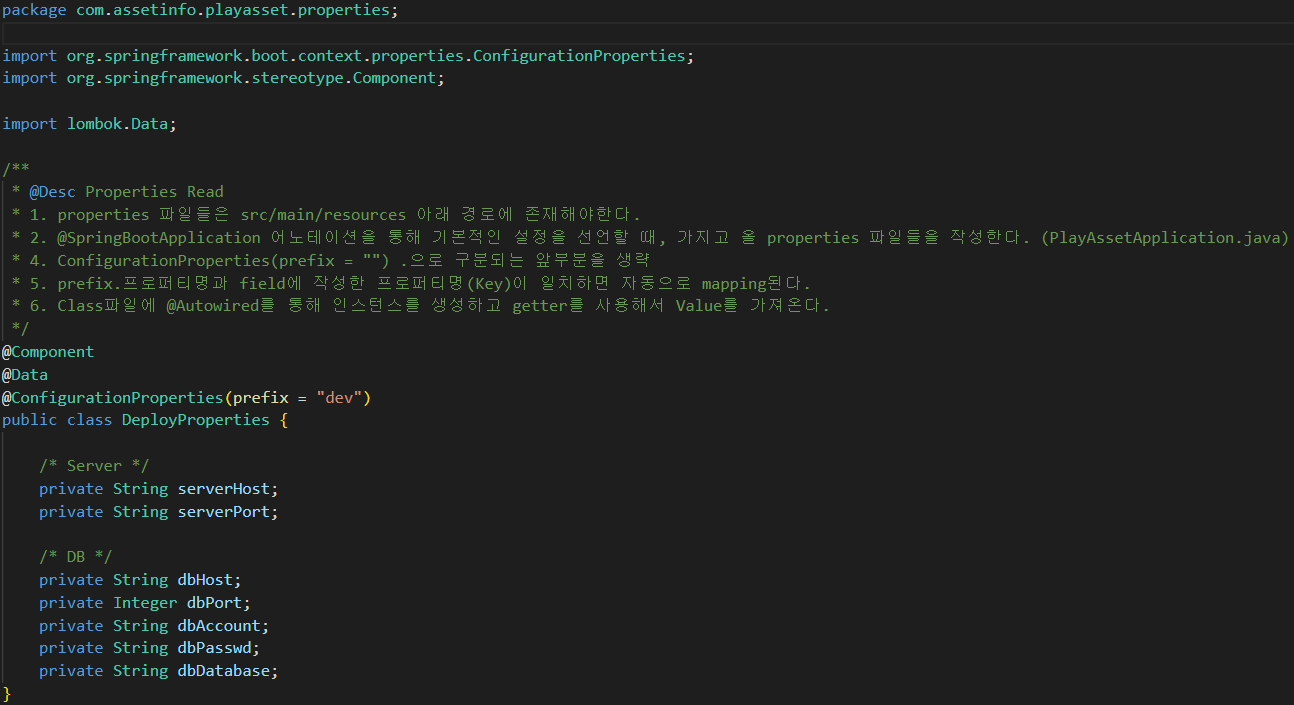
③ @Component: 개발자가 직접 작성한 Class를 Bean으로 등록해주는 Annotation
④ @Data: Lombok
⑤ @ConfigurationProperties(prefix=""): properties 파일안에 입력한 property의 prefix를 생략할 수 있다.
⑥ prefix를 제외한 property들을 Entity로 만들어준다.
|
package com.assetinfo.playasset;
import org.springframework.boot.SpringApplication;
import org.springframework.boot.autoconfigure.SpringBootApplication;
import org.springframework.boot.autoconfigure.jdbc.DataSourceAutoConfiguration;
import org.springframework.context.annotation.PropertySource;
/**
* @Desc 기본설정 선언
* 1. @SpringBootApplication 어노테이션을 통해 기본적인 설정들을 선언
* 2. @ComponentScan 어노테이션을 통해 @Component, @Service, @Repository, @Controller등의 어노테이션들을 스캔하여 Bean에 등록
* 3. @PropertySource 어노테이션을 통해 커스텀 properties 파일들을 READ
* 4. ignoreResourceNotFound = true 프로퍼티 파일들이 존재하지 않으면 SKIP
*/
@SpringBootApplication(exclude = {DataSourceAutoConfiguration.class })
@PropertySource(value = {
"classpath:deploy-dev.properties", "classpath:deploy-prd.properties"
}, ignoreResourceNotFound = true)
public class PlayassetApplication {
public static void main(String[] args) {
SpringApplication.run(PlayassetApplication.class, args);
}
}
|
⑦ @PropertySource Annotation 뒤에 읽어들일 Propeties 파일들의 경로를 적어준다.
DB Connection
|
import org.slf4j.Logger;
import org.slf4j.LoggerFactory;
import org.springframework.beans.factory.annotation.Autowired;
import org.springframework.context.annotation.Bean;
import org.springframework.context.annotation.Configuration;
import com.assetinfo.playasset.properties.DeployProperties;
import dev.miku.r2dbc.mysql.MySqlConnectionConfiguration;
import dev.miku.r2dbc.mysql.MySqlConnectionFactory;
import io.r2dbc.spi.ConnectionFactory;
@Configuration
public class DBConfig {
@Autowired
DeployProperties props;
private static final Logger logger = LoggerFactory.getLogger(DBConfig.class);
@Bean
public ConnectionFactory connectionFactory() {
return MySqlConnectionFactory.from(
MySqlConnectionConfiguration.builder().host(props.getDbHost())
.password(props.getDbPasswd())
.port(props.getDbPort())
.database(props.getDbDatabase())
.username(props.getDbAccount())
.build()
);
}
}
|
① Property에서 DB접속정보를 가지고 오거나 직접 하드코딩으로 값을 입력할 수 있다.
② DBConfiguration을 작성한 후, 서버를 실행했을 때 Exception이 발생하지 않는다면 성공이다.
DB Connection에 실패했을 경우
① 'ProjectName'Application.java 파일을 연다.
|
@SpringBootApplication(exclude = {DataSourceAutoConfiguration.class })
|
② SpringBootApplication Annotation뒤의 괄호부분을 모두 삭제한다.
③ (exclude = {DataSourceAutoConfiguration.class }) 삭제
'포트폴리오 > PLAYASSET' 카테고리의 다른 글
| [PF/PlayAsset] WebFlux개요(2) (0) | 2023.02.19 |
|---|---|
| [PF/PlayAsset] WebFlux개요 1 (0) | 2023.02.05 |
| [PF/PlayAsset] 개발환경구성(4) - AWS + Docker (0) | 2022.11.09 |
| [PF/PlayAsset] 개발환경구성(2) - WebFlux (2) | 2022.09.10 |
| [PF/PlayAsset] 개발환경구성 - 1 (0) | 2022.07.28 |